Hi to all my friends and family. A couple of blogs ago I mentioned how I used my art and art room to grieve for my grandmother when she passed away, and how it brought back my love of collage. Although my collage work now is much different than the collage I did way back in high school and college, it still is collage and has just evolved. The medium of collage is so fascinating to me, because it is such an easy way to express yourself through art and an art form that anyone can do. You do not have to be a 'master' artist to do the art form of collage. I have taken my love of the 'old style' collage of blending images in paper form together, and then thrown in a few other mediums and styles to make what I now do almost daily in my art work. Those artist friends that know me well can usually see a piece of my work and know it is mine before seeing the signature or the identification of the piece. I have grown to love the somewhat new art style of 'altered art' , and just melded it with my own style and creative touches. To me 'altered art' is really just collage work that is in a three dimensional form. I think the the 'chunky' styles you see a lot of, now in lots of art work, is also just a three dimensional collage work.
I thought it might be fun to show you the piece of art that started this new love of collage and art therapy for me. I also thought by seeing it and describing some of what I did with it and still do in most of my work, that it might open some new ideas and possibilities for you and your art work. Maybe some of you think that art is not a 'talent' you were blessed with , with this I hope you can see that there are always art talents hidden in all of us. We sometimes need to start with something that is fun and interesting, as well as a lower level of difficulty. Then before you know it, you are making art work that is meaningful, fun and your very own style. I will add a few close up pictures of the collage, so that you can get a feel for the piece and work a little better, as I describe what I did while making it etc. Because of the collage product I used, there is a glossy texture to the piece, which makes the photos difficult. I am also not exactly known to be great at taking pictures, that is my hubbies talent, not mine. But I think you can see enough of it that you will get an idea of what I did.

First you need to decide on what your theme or content will be, no matter what medium you are going to do in artwork, that is the first step. As you already know, with this piece, my theme was my grandmother. I wanted the collage to be about her and her life. She loved her kids and was very proud of her many grandchildren and great grandchildren, so I also wanted to include them in the work. I knew if I tried to have independent photos of everyone in the family, it would end up being a wall mural rather than a poster size piece. That meant I had to go through all of my photos and find those that had her in them and then narrow some of them down to those that were of her with all the kids and grand kids. But I made a point of picking only photos that she was in. Once I had my pictures out and pretty sure those I wanted to use, I scanned them and printed them on non glossy paper. If you do not have a printer or one that doesn't do the quality of picture copies you are happy with, then you can always go to any store that does good quality photo copies. I would make sure that you do some in all different sizes, especially those that have a lot of people or content in them. You need a variety of sizes, and it is easier to fit all of your pictures on a project if you make some of them small. You can use the ones that you like most a little larger, I used some of the pictures of grandma up close and different stages in her life.

As you can see in the picture to the right, I used a photo that is larger with a close up of her and her great grandchild.
The second step is to decide what you want to use as a base for your collage item. I chose to do mine on a large piece of matting board. You can do this kind of collage work on just about anything though. You can use canvas, wood items, paper items such as boxes made to collage or paint, paper cards that are blank and ready to decorate. You can even do this type of work on metal items, which I love to do. Just make sure you pick an item that is clean and dry. Some glass or metal items you might need to put a base coat of a preparation product. You can ask at any art/crafts type stores and they can tell you what you need to prepare a surface for collage work.
Once I got the size of matte board I was going to use, what my basic theme (grandma) was picked, my photos were copied...I then needed something that would bring my grandmothers personality out in the piece as well at tie all of the content together. She loved flowers, her family, fanciful things and her religion. She was very proud of her family and was a sentimental person. She liked to sit and tell you stories of her life and things that she was proud of , and she loved to display things around her so she could show them to everyone. I tried to get things for the project that would show her and who she was. Things like roses, fairies , vintage items, and quotes about family and love.


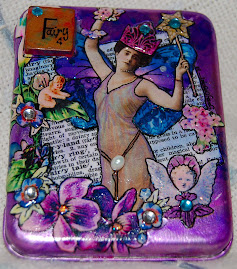
Both of these pictures show some of the items I used to bring out her love of family and give the piece a flavor of what and who she was in life. You can use quotes you like printed on velum or paper. You can cut out images in clip art books. You can also purchase packages and books full of paper image that are designed for doing collage type projects. I also made copies of some of the cards she had saved from family members to cut out and use, but you are not destroying the original item. Using copies of originals are easier to use, because if you make a mistake, or do not like the way it looks, you can redo it again. That is also why you want to use copies of photos, so you still have the originals to save however you choose. I also suggest that you buy an art work fixative spray and use it on all of your copies, drawings, stamping, or hand writing you did to use in your project. If you do this, there is less chance that you will have any kind of bleeding of ink or color in your projects. It is something I just have gotten into the habit of doing, since I use a lot of copied material and my own drawings, and it is so frustrating when you put the finish on and something bleeds. I like to use Krylon Workable Fixatif spray, but there are other brands out there too. You can use buttons, ribbon, old jewelry pieces that are not valuable, lace and just about anything you think makes a project have a 'feel' or personality to it. I chose to use some inexpensive jewelry pieces I had, like a butterfly and dragonfly pin that I found somewhere. I just removed the pin backs from them. The rhinestones made them stand out so well and were things that she would have loved.

I also found some old skeleton keys that would give a vintage feel. The copies of the cherubs and fairies were something she would have smiled at as well. There is no limits to what you can use to capture the personality of someone, or the feel that you are looking for.
Now that you have a bunch of images, photos,quotes and other ephemera and goodies set aside, you can start playing around with how you want it all to lay out. I like to take scrap booking paper, wrapping paper, fabric, lace, copies of sheet music or something like that to cover the total base of my item. With this project I used a paper that looked like a crackled old painted item. I do this so that if there is a gap between the items, there is still something with the theme or feel peeking through. You might want to stay away from real busy prints because it can make a project look too cluttered. Even though collage is kind of cluttering things together, you do not want to make it so busy that it is not pleasant to look at. Once the project is finished you want it to be interesting and draw a person into it. When looking at it, the eye should flow over the piece and have a look and feel of continuity. With this piece, many friends and family commented that they loved to look at it, because they can look again and again and still find things they did not see before, and that is the effect I love to have. I want to make something interesting and fun to look at, and also make it pleasing to look at over and over, but I don't want it to be so over done that the theme is swallowed up.
You can make the items in your project blend together nicely by using an embossing powder to the edges of some of the photos and items. You can also emboss stamped images, or write with an embossing pen and then use the embossing powder over it. I used a gold embossing powder over stamped images, writing and just to outline some of the photos. If you do not have the embossing ink and powders to do this with, you can find them in most craft/art sections. You just follow the instructions with the products for stamping and embossing. After I emboss I then use a paintable glitter on the edges of some photos, on the flowers and the wings of the fairies and cherubs. Be sure to let the glitter dry totally before you put a finish over it, so that the glue in the brushable glitter does not look milky when it dries. It will be clear and all you will see is glitter that enhances the area if you let it dry then use a finish.
Use a collage product to adhere what ever you choose as a base cover, such as Modge Podge or decoupage finish. My favorite is Royal Coat Decoupage Finish. I usually use clear, but sometimes, as I did

with this project, I use the finish that is sepia colored to give more of a vintage look. It also helps blend all of the different colors of the photos together. If you can't find a colored version, you can add a tiny bit of water based paint to tint it yourself. You can play around with a satin finish and a gloss finish on a small piece and let it dry totally to see which you like better.

After you have gotten the basic lay out with the photos, you can start using the decoupage glue/finish to the base. If you are afraid you will not like the placement and may want to rearrange the photos, you can do what I often do and use a non permanent sticky product to place your items that are going to lay flat on the base(you can move them around again and again until you are happy with placement). Once you have them where you want them you can then use the decoupage finish/glue over them. You might want to know that if you use velum, or a velum with a quote on it , that velum is famous for getting 'wrinkly' after you use a decoupage finish over it. I like the look, because it gives it more character and vintage feel, but some don't, so I would do a trial with a small piece of velum separately to see if you like it, before using it on your project. After that coat dries you can then use dimensional sticky tape, or sticky dimensional sheets with different sizes to apply other photos and items. The foam sticky pieces apply to the back of the item you are placing and attach it to your project. I used it to make some of the photos and flowers etc. stand out and make the project have so much more depth. I then use a good craft glue to attach the heavy pieces, such as jewelry,the metal letters that spell her name, buttons and also ribbon or trims like the tassel trim I used. After the glue totally dries and you have the 'standing out' objects all where they are to stay, use another coat of the decoupage glue/finish over the total project again. It will make your project much more durable and able to even touch. You can not tell by the photos, but the tassel trim I used is actually permanently placed and hard. It gives it a finish that holds permanently, but does not take away from the look. You have to reach out and touch the tassels to feel that they are hard and permanent. They look like they are still dangling free, but are very intact and solid.
I like to take a pigment ink pen, after the project is totally dry , and then write my own words, or outline many of the objects. This gives a flow to everything and makes things stand out and gives the project a finished look. Be sure and use the workable fixative spray if you do use the pen, so that it will not smear and will be permanent. Once the project is totally dry you can decide to frame it under glass, or you can do like I did and just add a matte to frame it. I stamped and embossed images on the double matte and then added the paintable glitter to the inside matte. Once all of this was totally dry, I used the finish over it as well to make it more durable. You can actually wipe the project off to keep it clean, and it will withstand it. It is the same way if you do this type of 'collage' on a box or something else. It is much more durable than you would ever think.
This project was the beginning of many, many more since then. I have learned and grown a lot with each and every one of the things I made after it. But I also look at this daily and each time I do..............it makes me smile. I am happy that it brings her to mind each and every time too. She would be thrilled and excited to know that I did something like this to honor her and to make sure that she is always remembered by those who visit and see it too. I am sure if I make myself look real, real close there would be some things that I might do differently and I am sure it would look better if I made it today, but I would not change it if given the chance. I like that it not only makes me remember my wonderful grandmother, it also reminds me of my growth in my artwork.


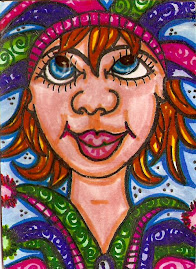
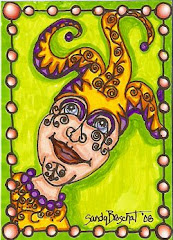
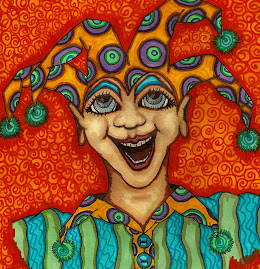
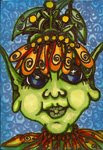
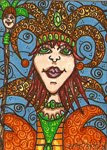
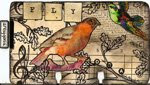
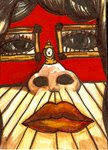
 ok, so I fell of the planet for a few days.........maybe a little longer. Seems like I do nothing butchase my own tail. We have been moving the kids in to help out. Bill had his second ankle/foot surgery two weeks ago. He is doing much better with this surgery than the one a year ago. but without offending any guys out there, no offense, but god guys are boobs when they do not feel well. to make it even more fun I had a minor surgery two days after bill's. so thank god for the kids. I have been going stir crazy.............I am now sharing my art room with my daughter, so she can stay here. although I am grateful, it does put a crimp in my style. I like to make great big messes when i am working on a project and that is just not possible. plus I happen to be one of those vampire types that does not sleep well at night and often can be found in my 'art cave' at the wee hours working on something to keep my hands and brain busy. kinda hard to do that now unless I want to buy night vision goggles and give it a try. soooo I have been doing alot of drawing late at night while watching brain draining t.v. one can never understand the term 'brain draining' until you see what is on the boob tube at 3 am. normally I have the music on blasting (hubby is asleep in our room on other side of house) and the lights on and can work on any project and bother no one, but the fish in my little desk fish tank. I even have a doggie bed in my art room too, so my doggie Uno can get her beauty sleep while I get none. so needless to say, I am missing my altered art and the messy stuff I love. oh well, lots of worse things out there. I need to learn to be a creature of the moment, not my normal obsessive compulsive self, that likes things to be my way or the highway...........or my normal routine at least. I always love to draw, but I guess I have a short attention or something, becuase I like to mix things up often and do different projects at the same time. I hauled all of my billions (and that is not an exageration) of pens and markers to the hospital with me for Bill's surgery. since they put the most uncomfortable chairs as possible in the waiting areas, it was interesting to find a comfortable way to draw. because I am not a contortionist, and because I am just barely above the height of a dwarf, I had to finally sit indian style in the chair with a lap desk and my drawing pad. I just could not bring myself to sit on the floor in a hospital. I don't know, but it seems the older I get, the more paranoid I get about things. The kids would just stretch out on the carpeted floor, while I had visions of the little green bug, Mr. Staff infection , jumping up and down on them saying neener neener. I don't remember being that way when I was young and dumb. Just like eating out at a fast food place and now I can't stand it if I don't put out a napkin on the table, and I almost have a brain anurism when one of the kids picks up a french fry they dropped on the table and then eat it. I guess it is sad but true, my kids said I am old as dirt and just a big dork. ok this entry will be short but sweet. ok, it is short............ I will add a couple of the drawings from the hospital.